Adding a countdown timer in MailChimp
When creating emails in MailChimp, you can choose between using the drag-and-drop editor or coding your own template. The method for adding a countdown timer differs depending on which approach you take. In this guide, we'll walk you through the steps for both options, so you can easily add a timer to your email campaign no matter how you build it.
Adding a countdown timer using the drag-and-drop editor
- Create a countdown timer using CountdownMail timer editor and copy the timer embed code.
- Select the email template you want to enhance with the countdown timer.
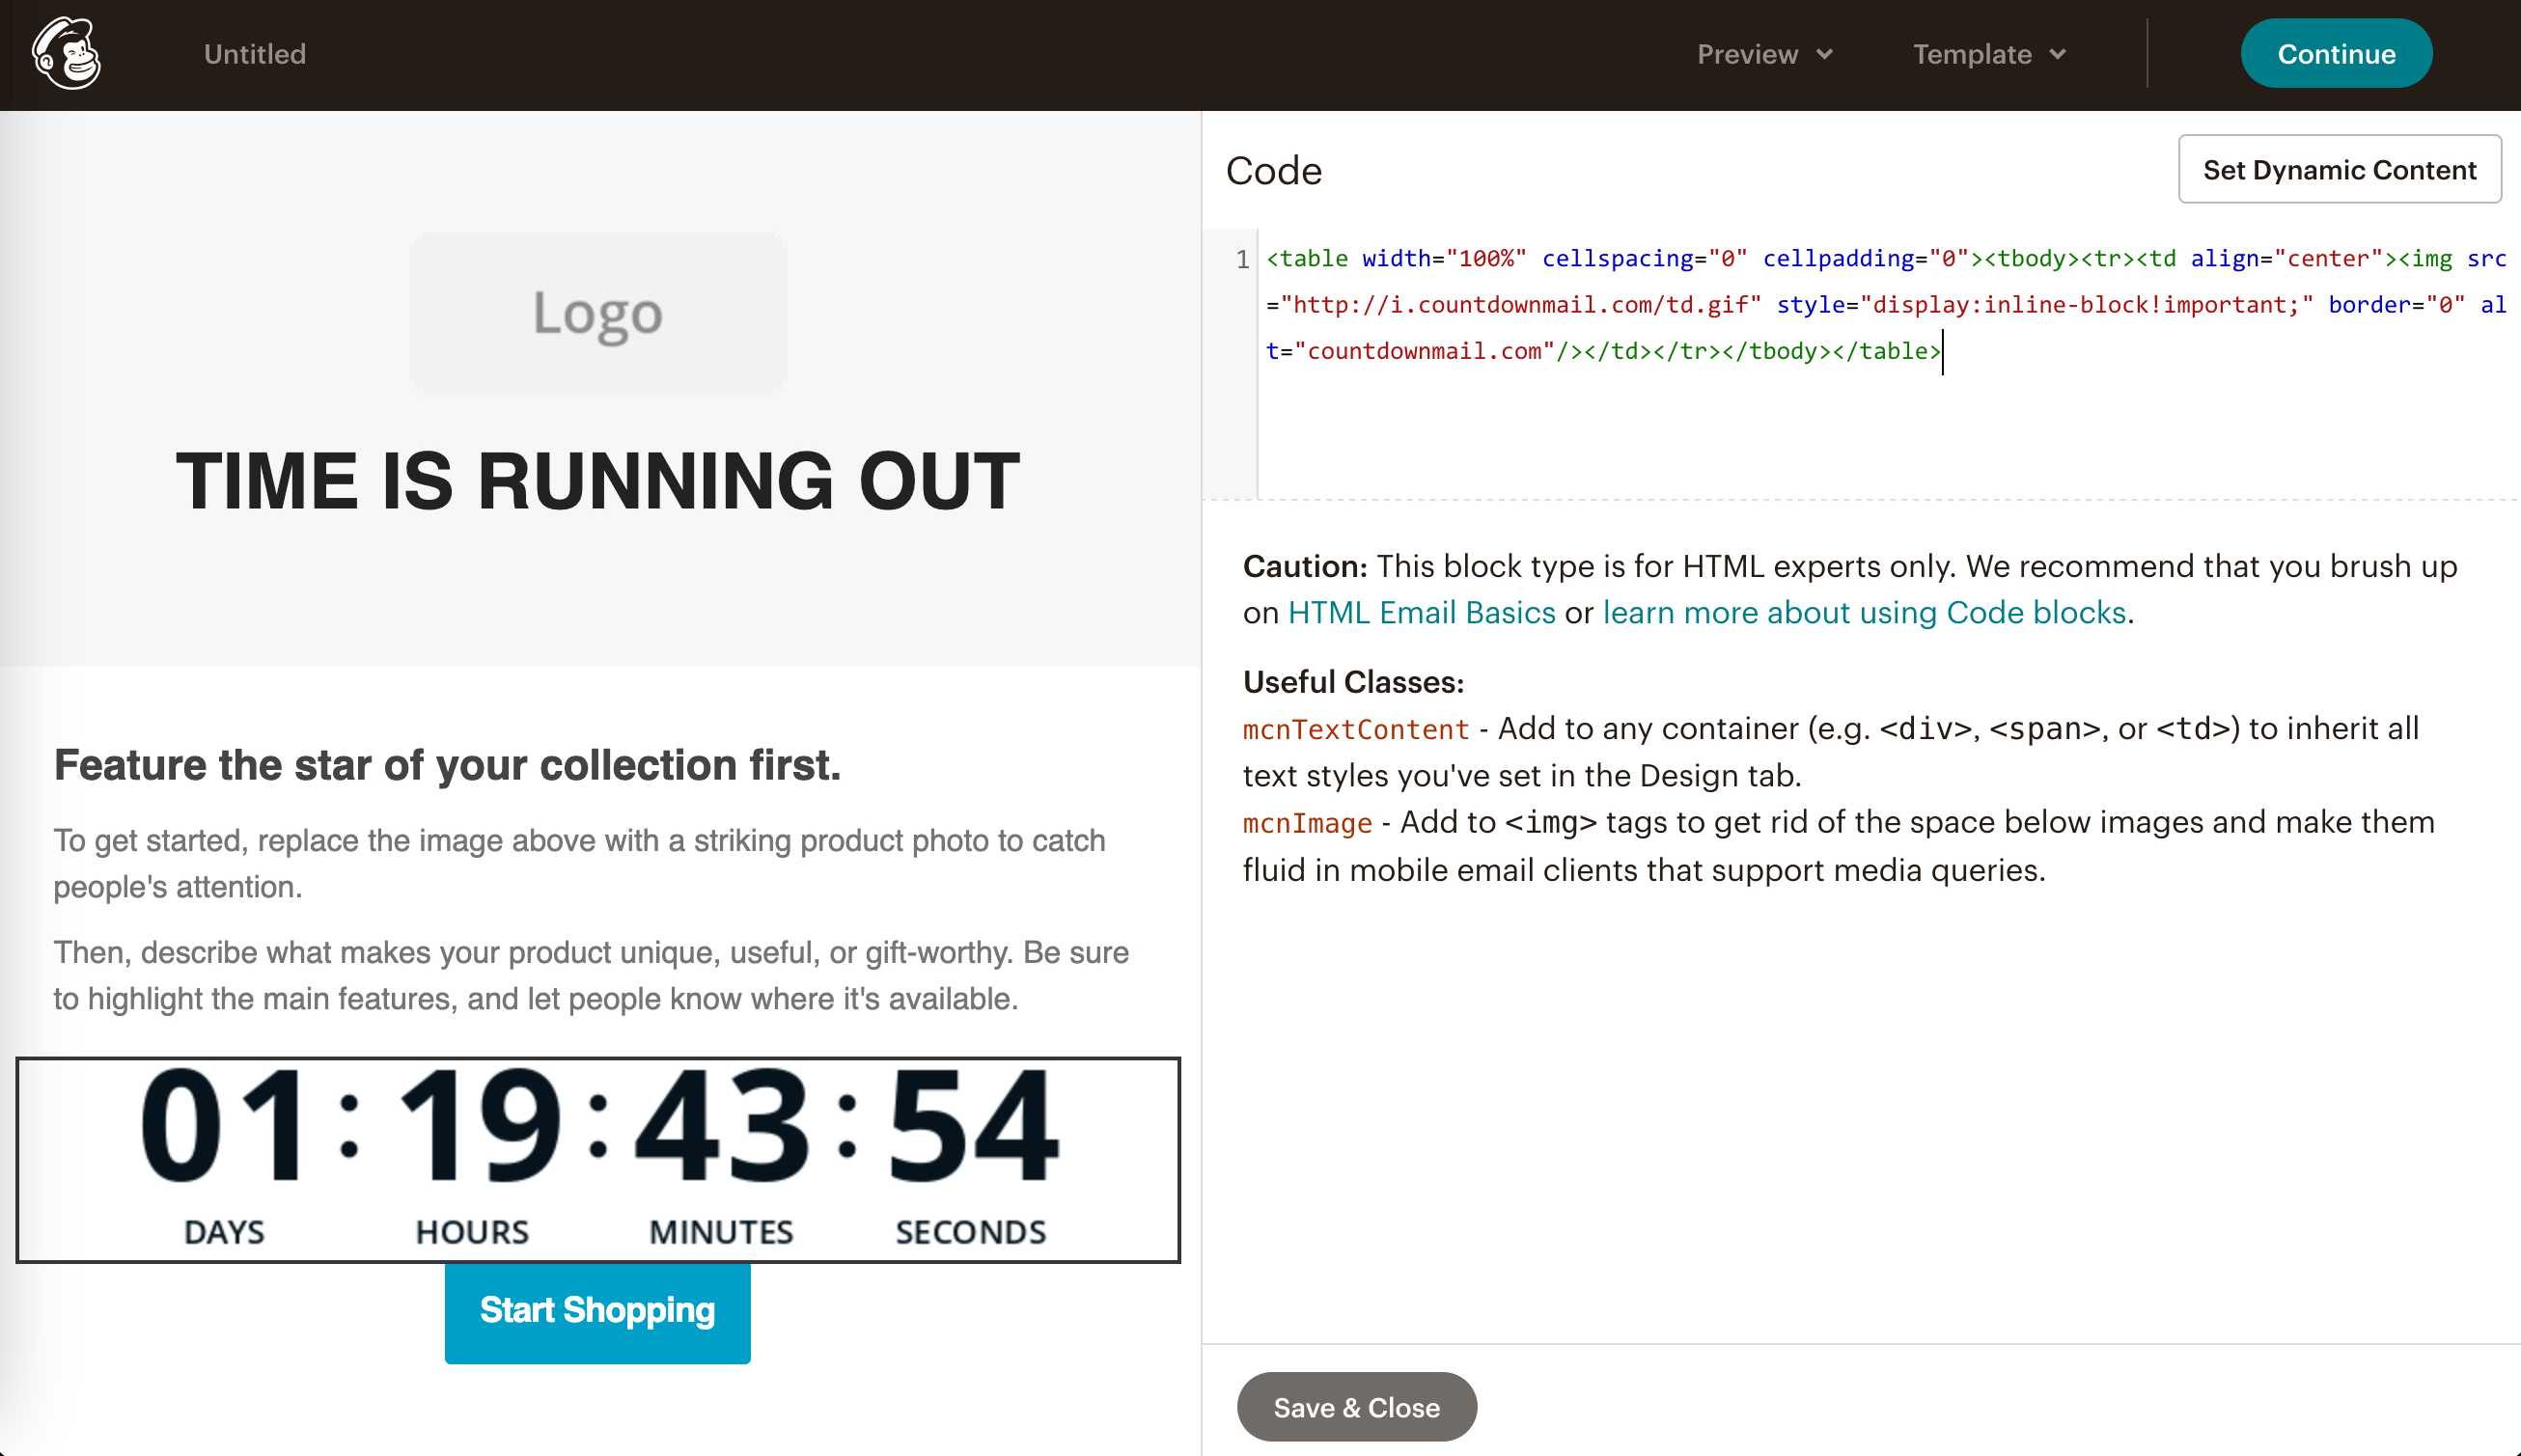
- In MailChimp's email designer, find the HTML block. Drag this block to the section of your email where you want the timer to appear.
- Paste the embed code for the countdown timer into the HTML block.
- Preview and test your email to ensure the timer looks appealing and functions correctly, capturing your audience's attention.
Adding a countdown timer into the "Code Your Own" template.
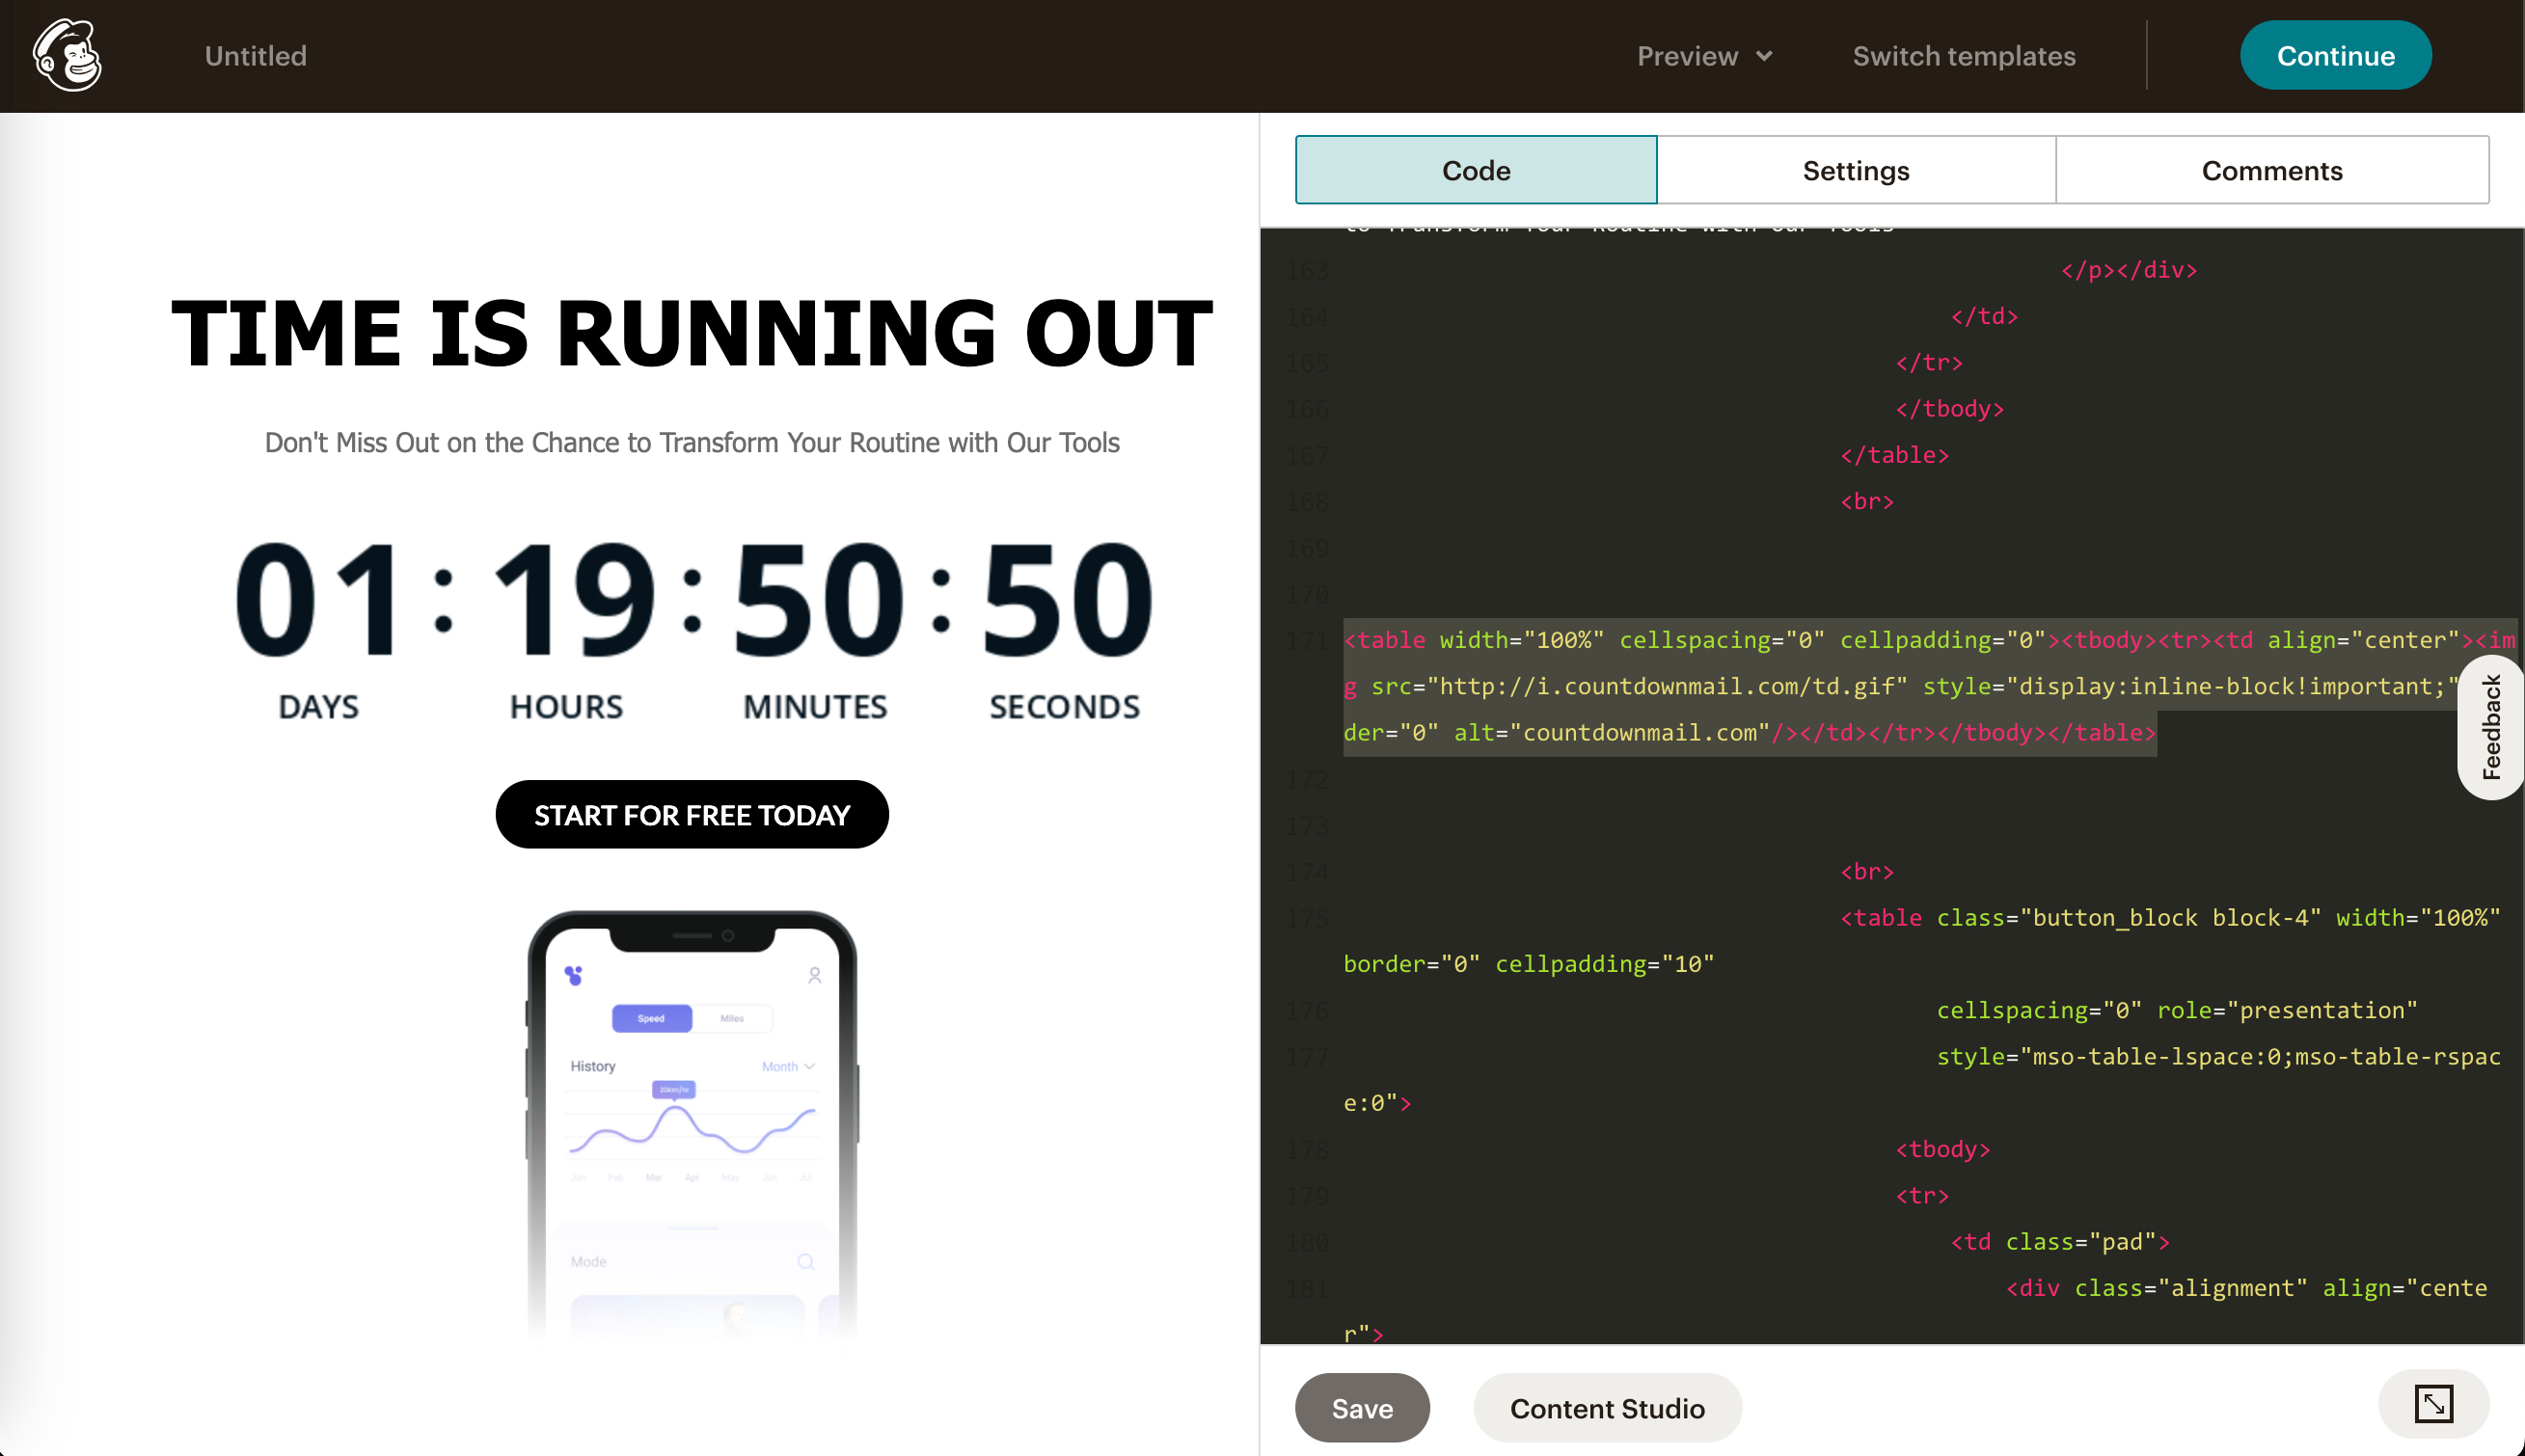
- Navigate to the Template step of the Campaign Builder, and click Code Your Own.
- Paste your timer embed code into the HTML content at the desired place of your email.
- Click the "Save" button to save the timer code you've just added.
Ready to boost your conversions?
Create a countdown timer in minutes and watch your engagement soar.