Adding a countdown timer in Other ESP
Creating an embed code for any email service provider (ESP) is a fairly simple process. With just a few steps, you can create a evergreen timer that is unique to the individual recipient.
Before you get started, you must understand the role of the id parameter in the embedded code. This id must be unique for each recipient, as it is what the evergreen timer is based on. When the recipient opens an email with an evergreen timer, our server will save the opening time and start the evergreen timer from that date.
Here is a step-by-step guide to creating an embed code for any Email Service Provider (ESP):
Step 1: Find the Unique Tag for Each Recipient
To create an embed code for your ESP, you need to find the unique tag for each recipient. If you do not know the personalized tags for your ESP or your editor does not have the option to insert personal data into the email, you need to find them in your ESP guides. To do this, go to Google and search something like "{name your ESP} personalization merge tags, custom field list". This should provide you with a link to the help center of your ESP, where you can find a list of all available personal fields. Look for a field that is unique to each subscriber and use this as your {uniq id}.
Step 2: Create the Embed Code
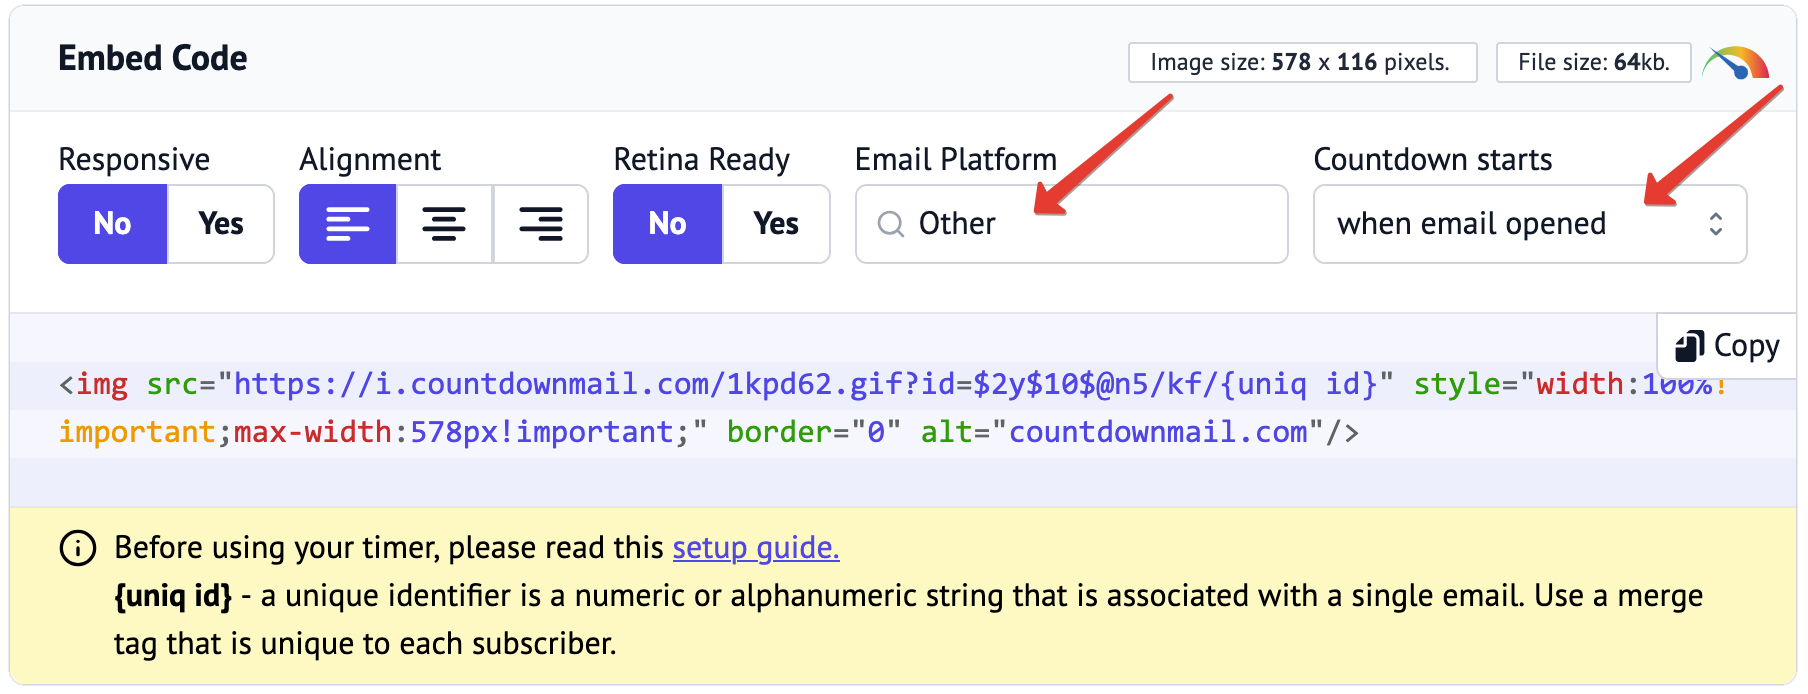
Now that you have the personalized tags, you can create your embed code. To do this, copy the timer embed code for Other ESP and replace {uniq id} with the unique tag you found.
Step 3: Test the Embed Code
Once you have created the embed code, you will want to test it to make sure it works properly. Simply send a test email with the evergreen timer to yourself and see if the timer works as expected.
For example, let's create an embed code for SalesLoft.
To find out the unique tag for each recipient, we need to go to Google and search something like "SalesLoft personalization merge tags, custom field list". Google gives us a link to the SalesLoft help center where there is a list of all available personal fields. The {{email_address}} suits us because this single field is unique for each recipient. Now, knowing the name of the unique field, we can create an embed code for SalesLoft.
In code for embedding our timer for other ESPs:
<img src="https://i.countdownmail.com/1kpd62.gif?id=$2y$10$@n5/kf/{uniq id}" border="0" alt="countdownmail.com"/>Replace {uniq id} with the unique tag {{email_address}}
<img src="https://i.countdownmail.com/1kpd62.gif?id=$2y$10$@n5/kf/{{email_address}}" border="0" alt="countdownmail.com"/>And it's all! With these simple steps, you will now be able to generate an embed code for any ESP.
Creating an embed code for an evergreen timer that starts when an email is sent
To ensure that your timer starts exactly when an email has been dispatched, it is essential to use a tag containing the current time. This tag must then be passed on to the "send_time" parameter. However, it's worth noting that not all Email Service Providers (ESPs) possess this tag. Thus, if you cannot find the tag, actualizing this timer trigger may be impossible. An excellent case in point is Salesloft. Nonetheless, let's create an insert code for another ESP, such as Convertkit.
Step 1: Identifying the current time tag
The first step is to determine the specific tag for time. This step can be achieved by executing a Google search entailing terms such as “Convertkit personalization merge tags, list of custom fields”. As a result, Google would provide a link to the Convertkit Help Center with a list of all accessible fields. Under the Date & Time Filters section, we find the {{ "now" | timestamp }} tag, which is ideal for our needs.
Step 2: Create the embed code
Having identified the name of the current time tag, we can craft the Convertkit embed code. In our timer's insert code:
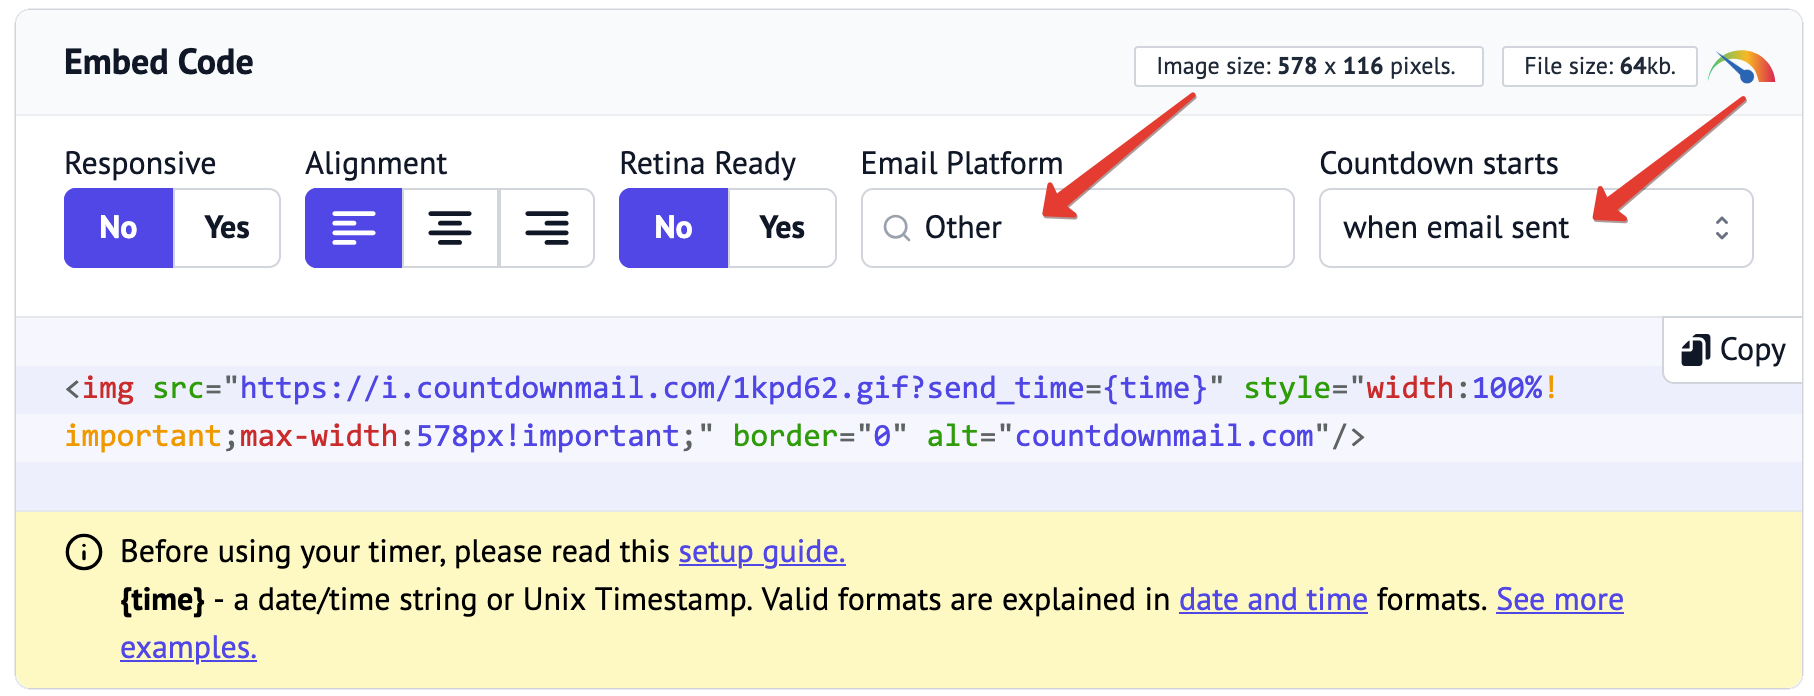
Replace {time} with the current time tag {{ "now" | timestamp }}
<img src='https://i.countdownmail.com/1kpd62.gif?sent_time={{ "now" | timestamp }}' border="0" alt="countdownmail.com">Voila! Now, you've mastered creating insert codes for any ESP. It's crucial as it lets you personalize your emails and boost your subscribers' engagement and connectivity.
Step 3: Send a test email
Once you've created an insert code, it's undoubtedly prudent to test it. Send a test email with the "evergreen" timer to your address and observe if the timer works as anticipated.
Integrating evergreen timers into your emails enables you to present your subscribers with perpetually relevant content and enhance their interaction via very simple steps. Therefore, never stop testing all your timer-based emails to guarantee optimally satisfying results.
Ready to boost your conversions?
Create a countdown timer in minutes and watch your engagement soar.