Adding a countdown timer in ActiveCampaign
Add a countdown timer using the email designer.
- Choose a template.
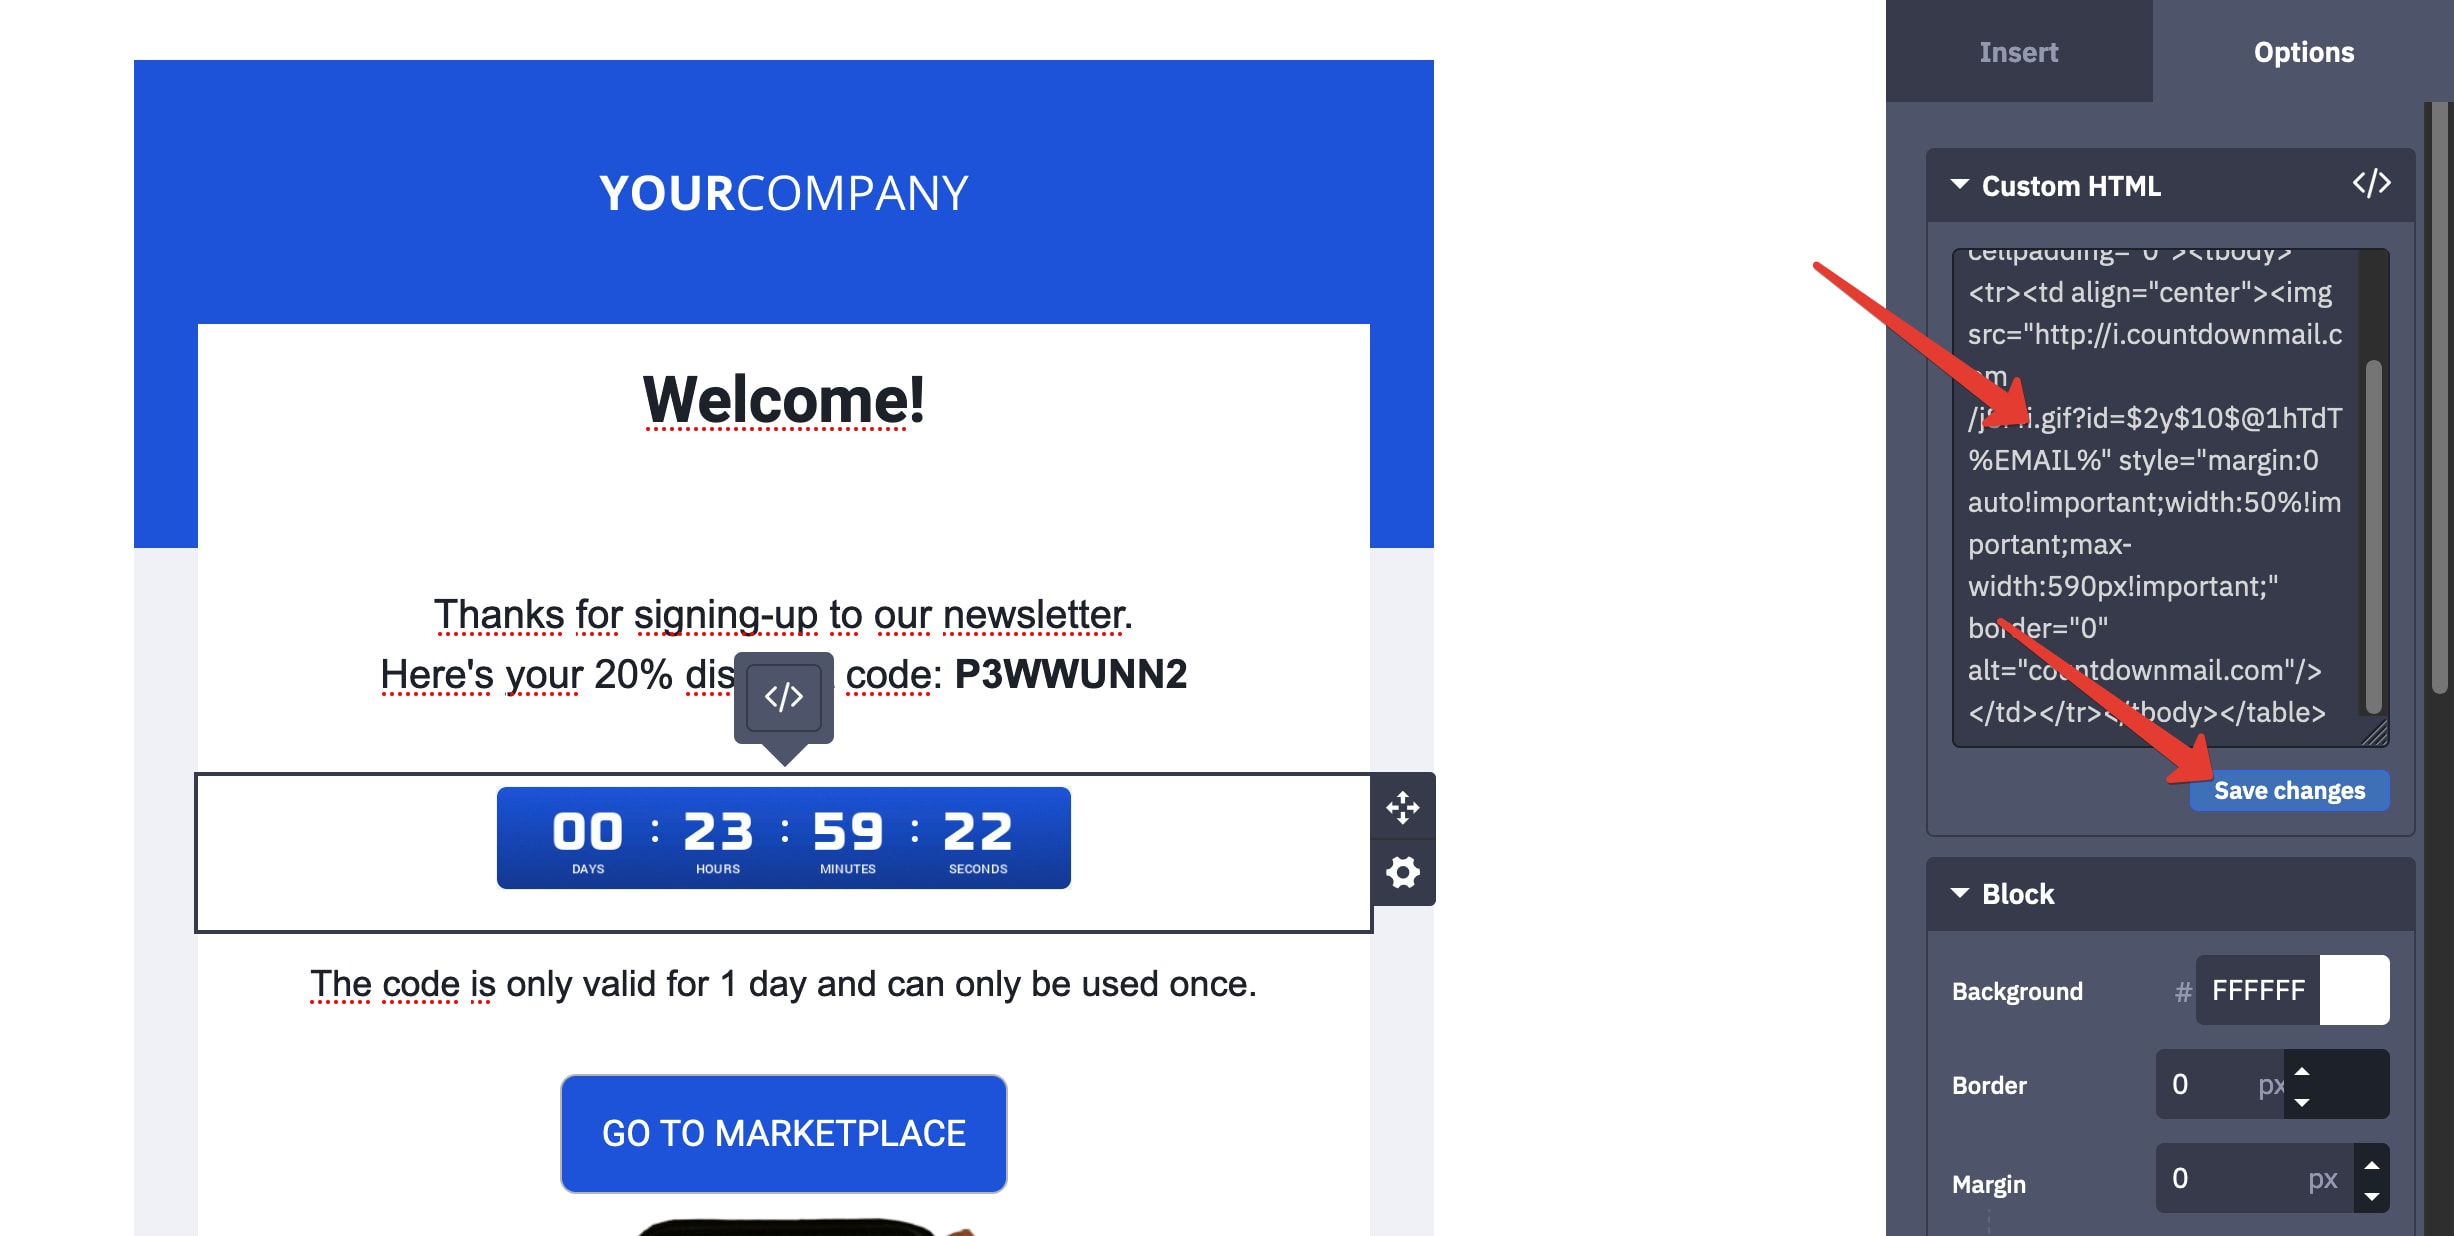
- Add HTML Block, select the appropriate button from the right-hand toolbar and drag it to the section of your email template where you want to drop it in.
- Select HTML Block, click Options tab.
- Paste your timer embed code into the text section at the desired place of your HTML block.
- Click the Save Changes button.
ActiveCampaign Integration for evergreen timers
The CountdownMail app is an automation action that allows you to start a countdown timer when a contact passes through this action in your automation. For example, you can use this action to start a timer for this contact when an email has been sent or when the contact was added to the list.
Add and configure the "Start Countdown Timer" action in your automation
- Create an evergreen countdown timer written in this tutorial..
- As a trigger, select "when the email is opened" and copy the embed code.
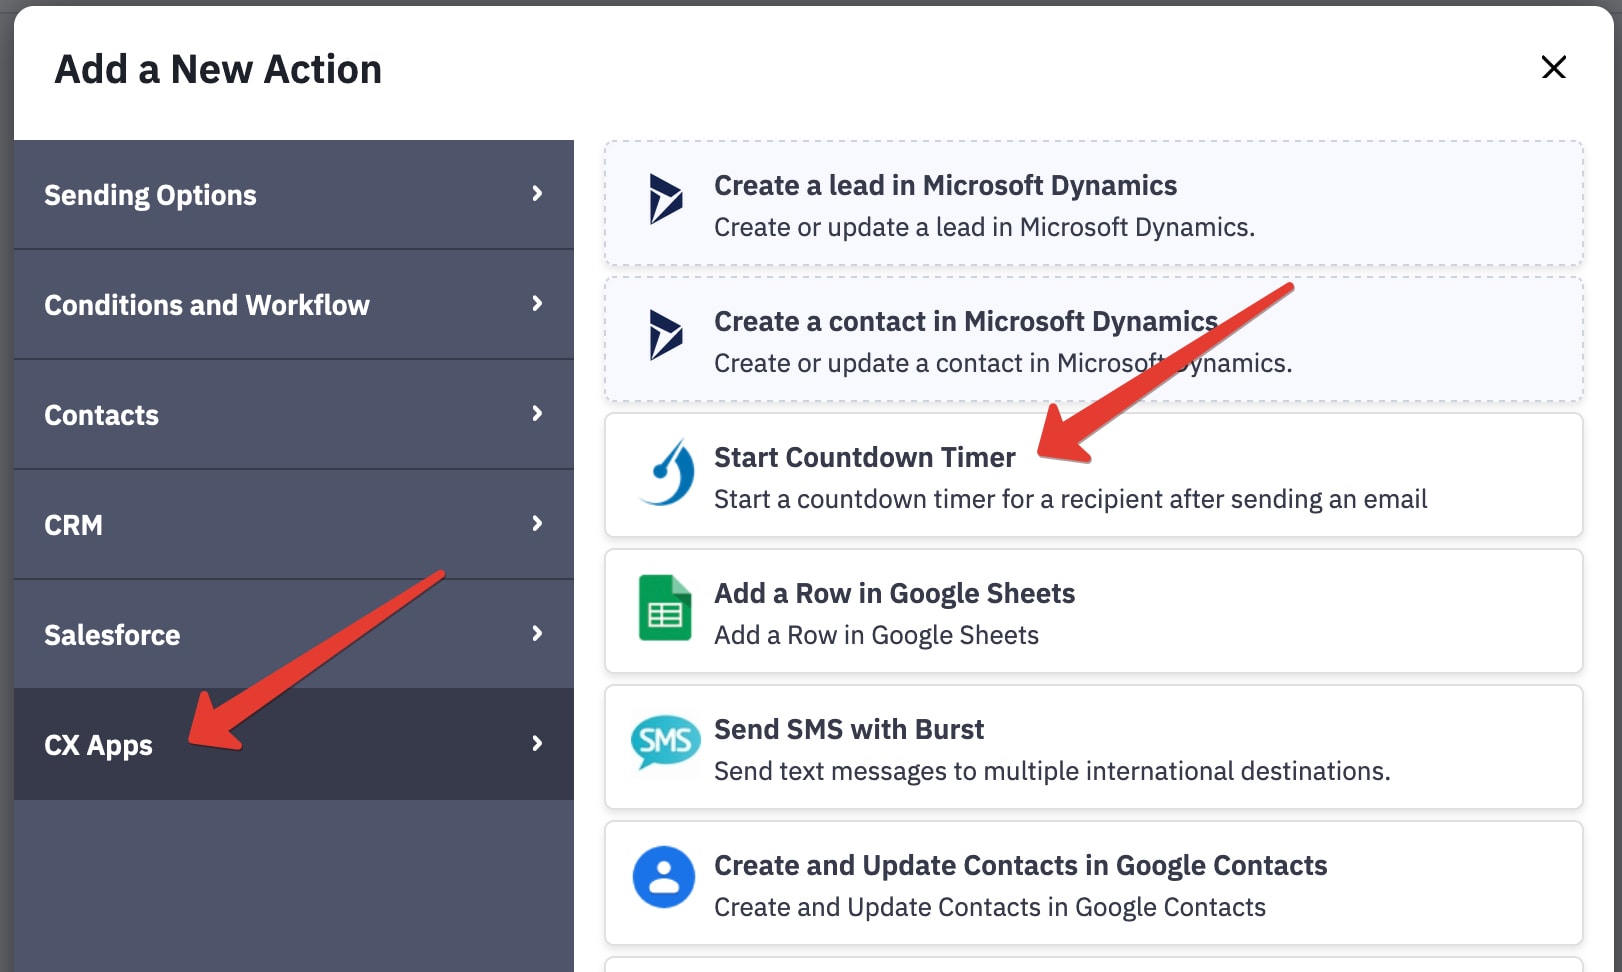
- In the automation builder, add a new action "Start Countdown Timer".
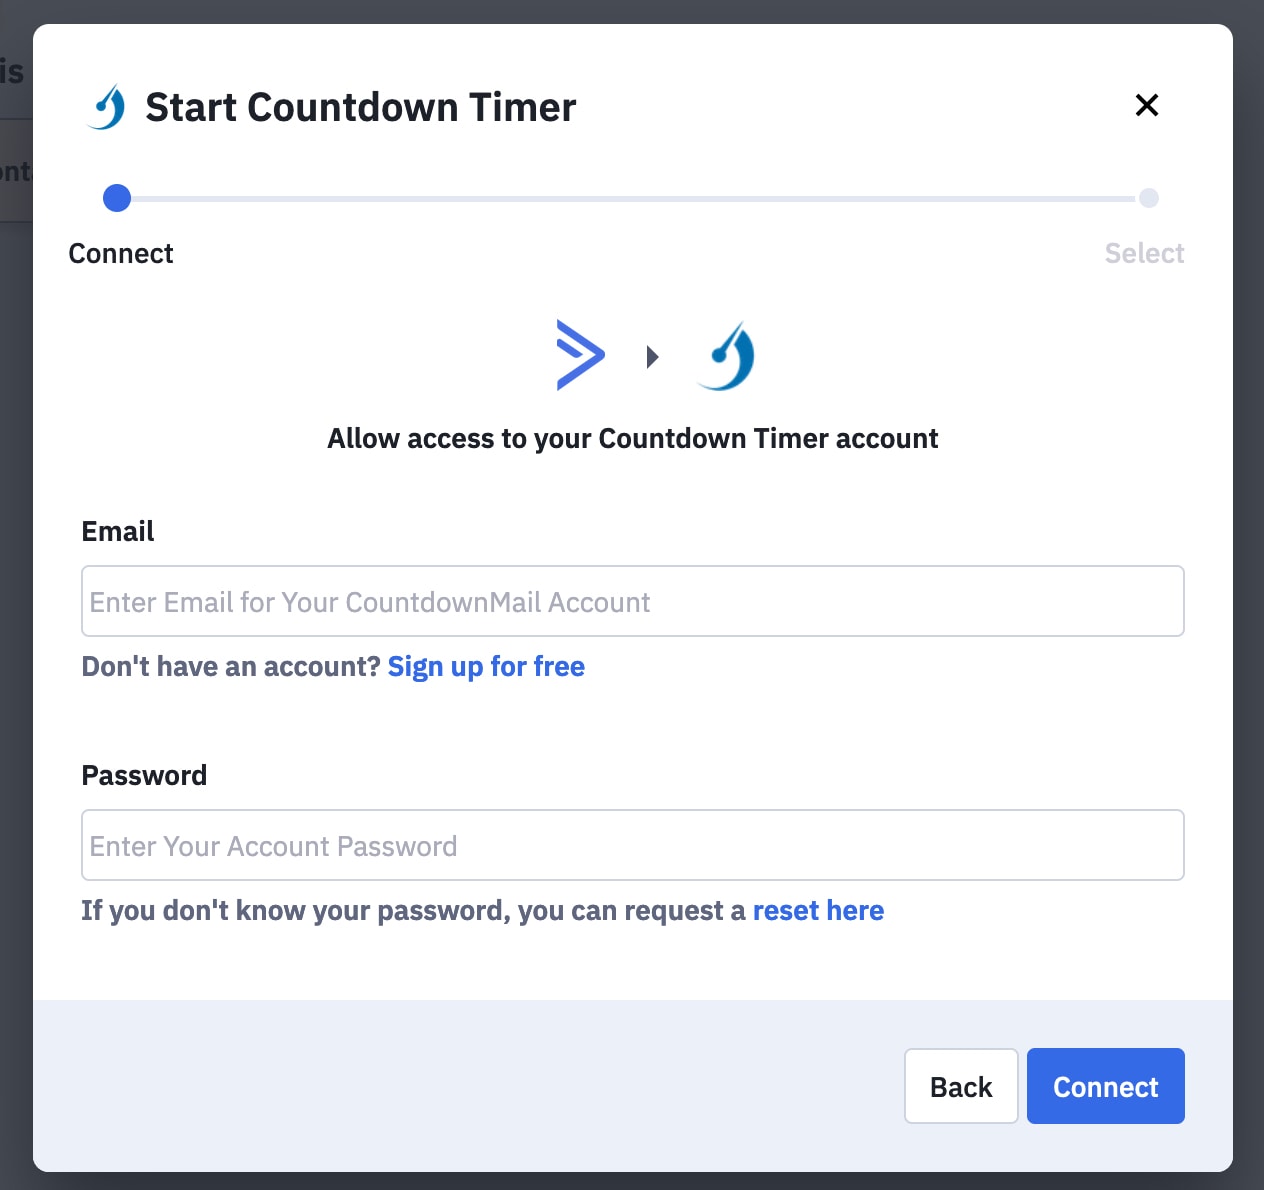
- If this is your first time integrating, you will be asked to login to your CountdownMail account. Enter your email and password for CountdownMail account and click the "Connect" button.
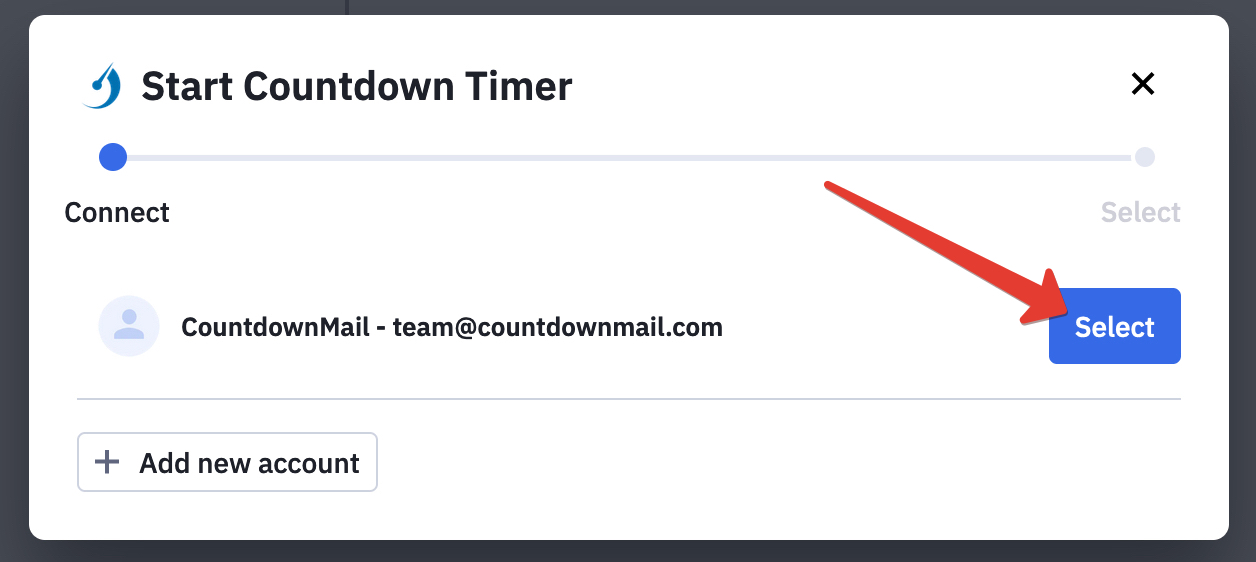
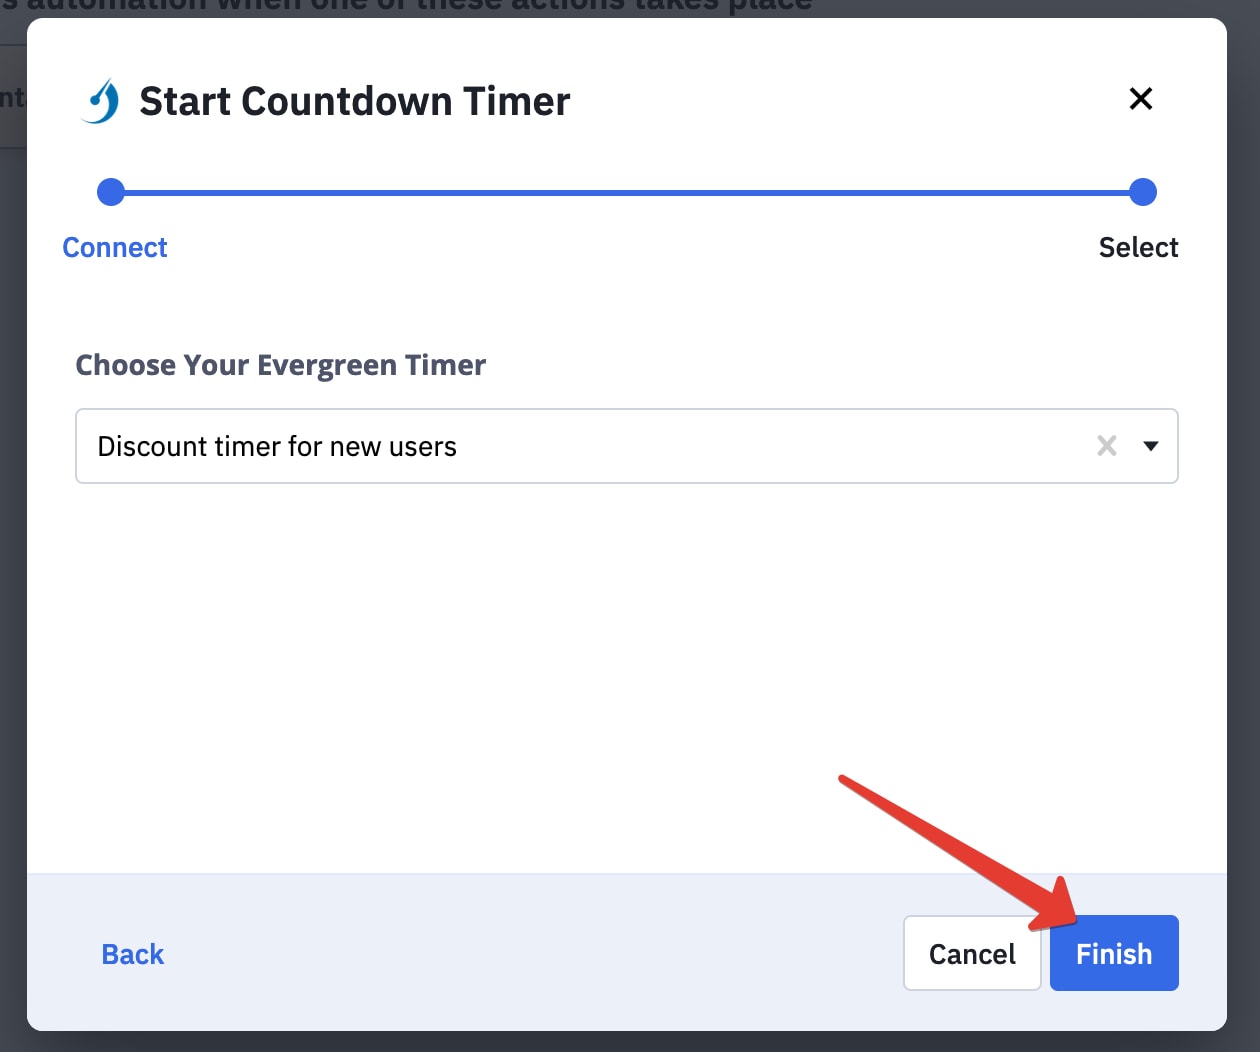
- Next, you’ll need to select the countdown timer you wish to start and press "Finish" button.
- The "Start Countdown Timer" action will be added to your automation.
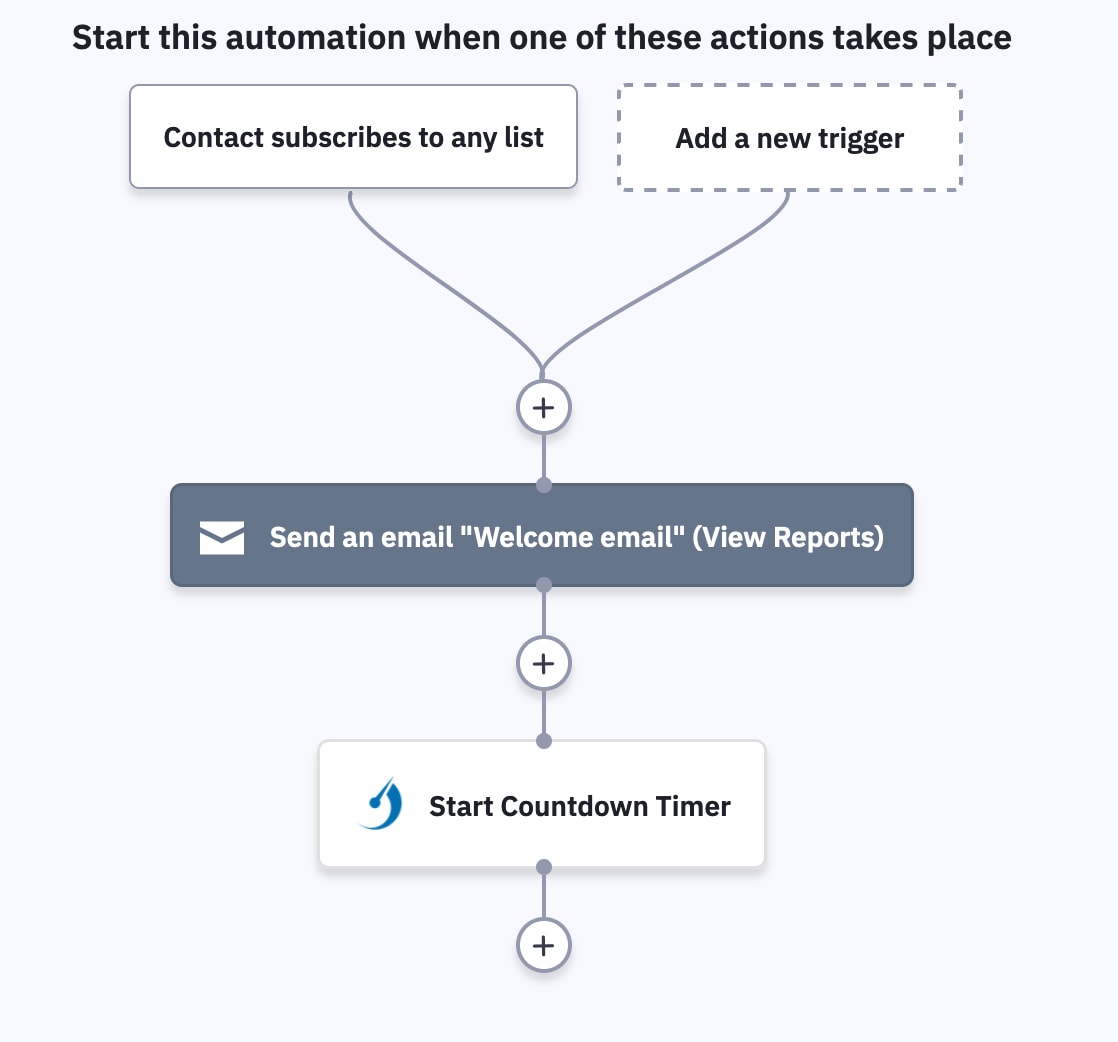
Please note that if you set up the action "Start Countdown Timer," the countdown timer will begin counting down from the moment the email is sent, not when it is opened.
In addition, the integration will be listed on the "Connected Apps" page in your ActiveCampaign account, where you can disconnect the integration, view logs, and view app details.
Disconnect your CountdownMail account from ActiveCampaign
You can disconnect your CountdownMail account from ActiveCampaign. When your CountdownMail account is disconnected, you will no longer be able to start a timer using the CountdownMail app.
- Click "Apps" in the left menu.
- Click "Connected Apps."
- Click the "CountdownMail" app.
- Click the "Disconnect" button.
- A confirmation dialog box will appear. Click the "Disconnect" button.
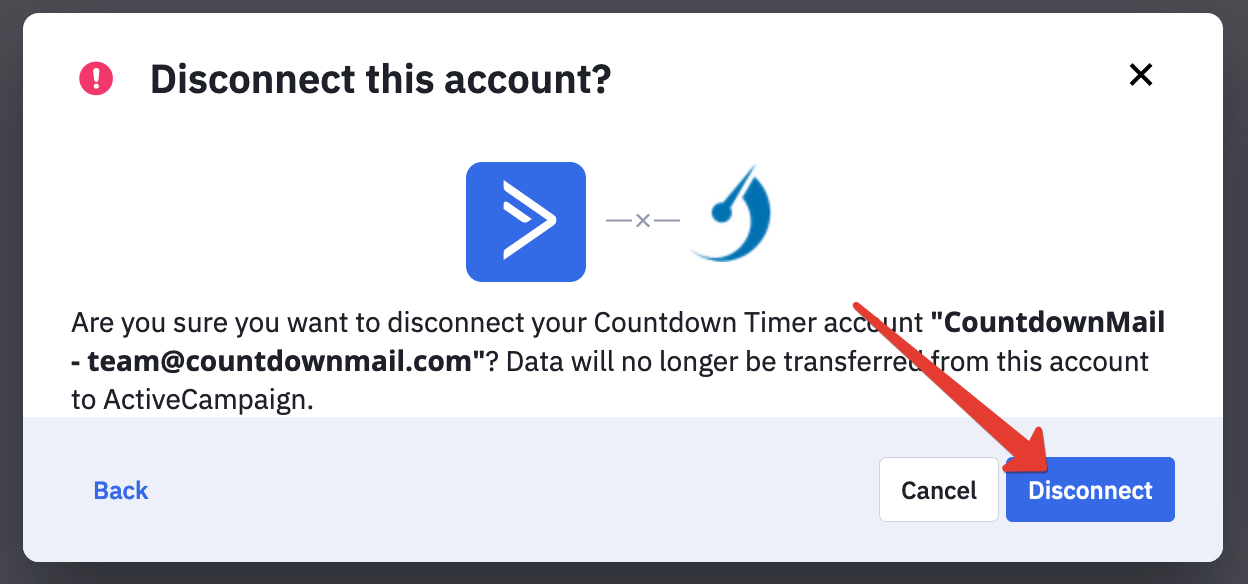
Your CountdownMail account will be disconnected from ActiveCampaign. A confirmation message will appear at the top of the CountdownMail app page.
Ready to boost your conversions?
Create a countdown timer in minutes and watch your engagement soar.