Adding a countdown timer in Gmail
Countdown timers are a powerful tool in email marketing, creating a sense of urgency and encouraging recipients to take action before time runs out. Whether you're promoting a flash sale, inviting subscribers to an event, or reminding them of a deadline, a countdown timer can significantly boost engagement. In this step-by-step guide, we'll show you how to easily add a customizable countdown timer.
Step 1: Create Your Countdown Timer on CountdownMail
- Visit the CountdownMail website and sign up or log in to your account.
- Click on "Create Timer" to start designing your countdown timer.
- Set the end date and time for your countdown. This is the moment when the timer will reach zero.
- Customize the appearance of your timer to match your email's branding. You can adjust options like font style, size, background color, and text color.
- Once your timer looks perfect, proceed to the next step to get the embed code.
Step 2: Get the Image URL for Your Timer
- In the CountdownMail interface, find the "Embed code" section for your timer.
- Locate the URL of the timer image within the embed code. This URL typically starts with https and ends with .gif.
- Copy this image URL to your clipboard.
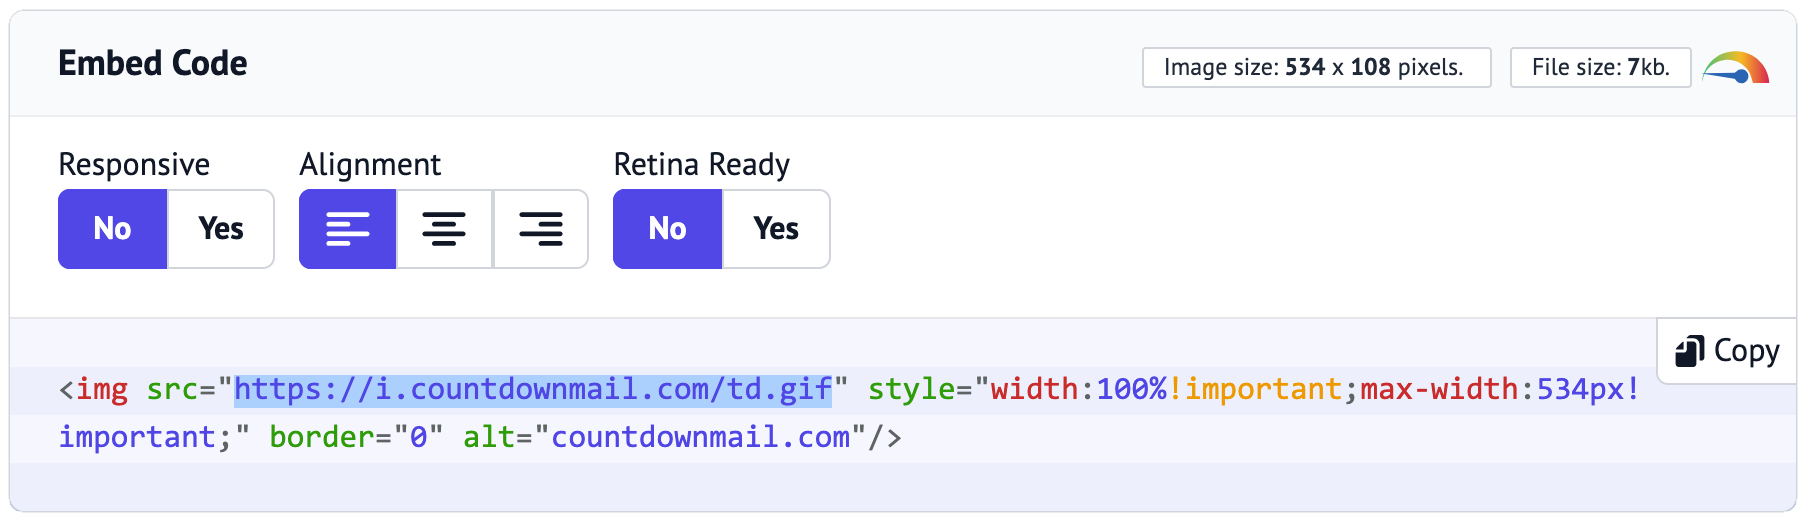 Note:Ensure you copy only the image URL, not the entire embed code, as Gmail will use this URL to insert the image.
Step 3: Compose Your Email in Gmail
- Log in to your Gmail account.
- Click on "Compose" to start a new email, or open an existing email to reply or forward.
- Click in the body of the email where you want the countdown timer to appear.
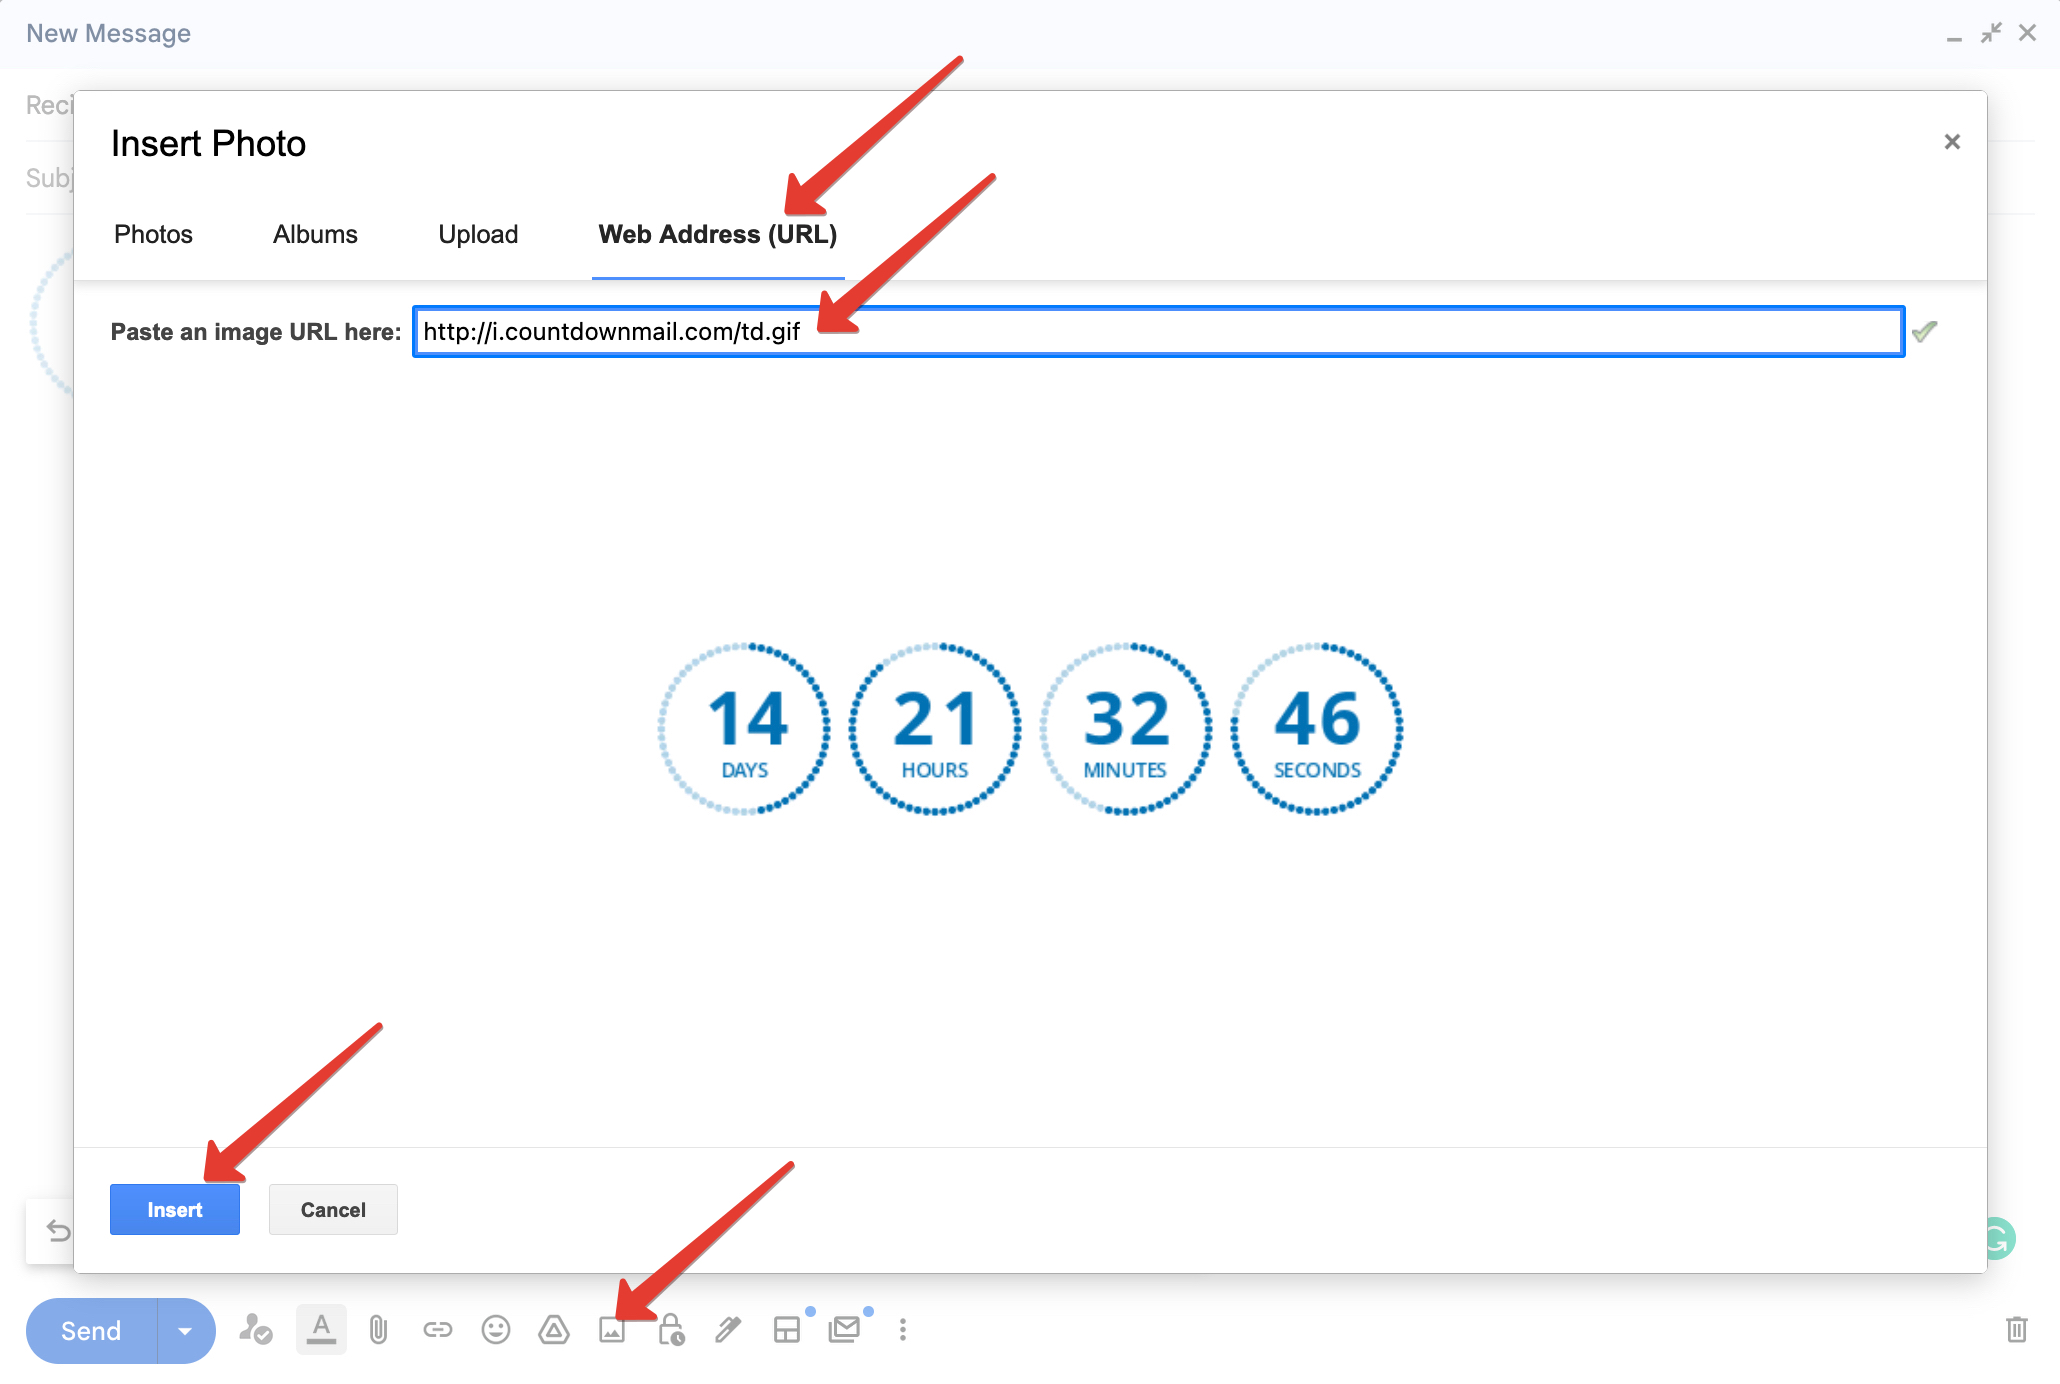
- In the Gmail compose window, click on the "Insert Photos" icon (it looks like a mountain with a sun).
- Select the "Web Address (URL)" tab in the insert image dialog.
- Paste the URL of your countdown timer image that you copied from CountdownMail.
- Wait for the image to load in the preview. This may take a few seconds depending on your internet connection.
- Click "Insert" to add the image to your email.
Step 4: Adjust the Image Size (Optional)
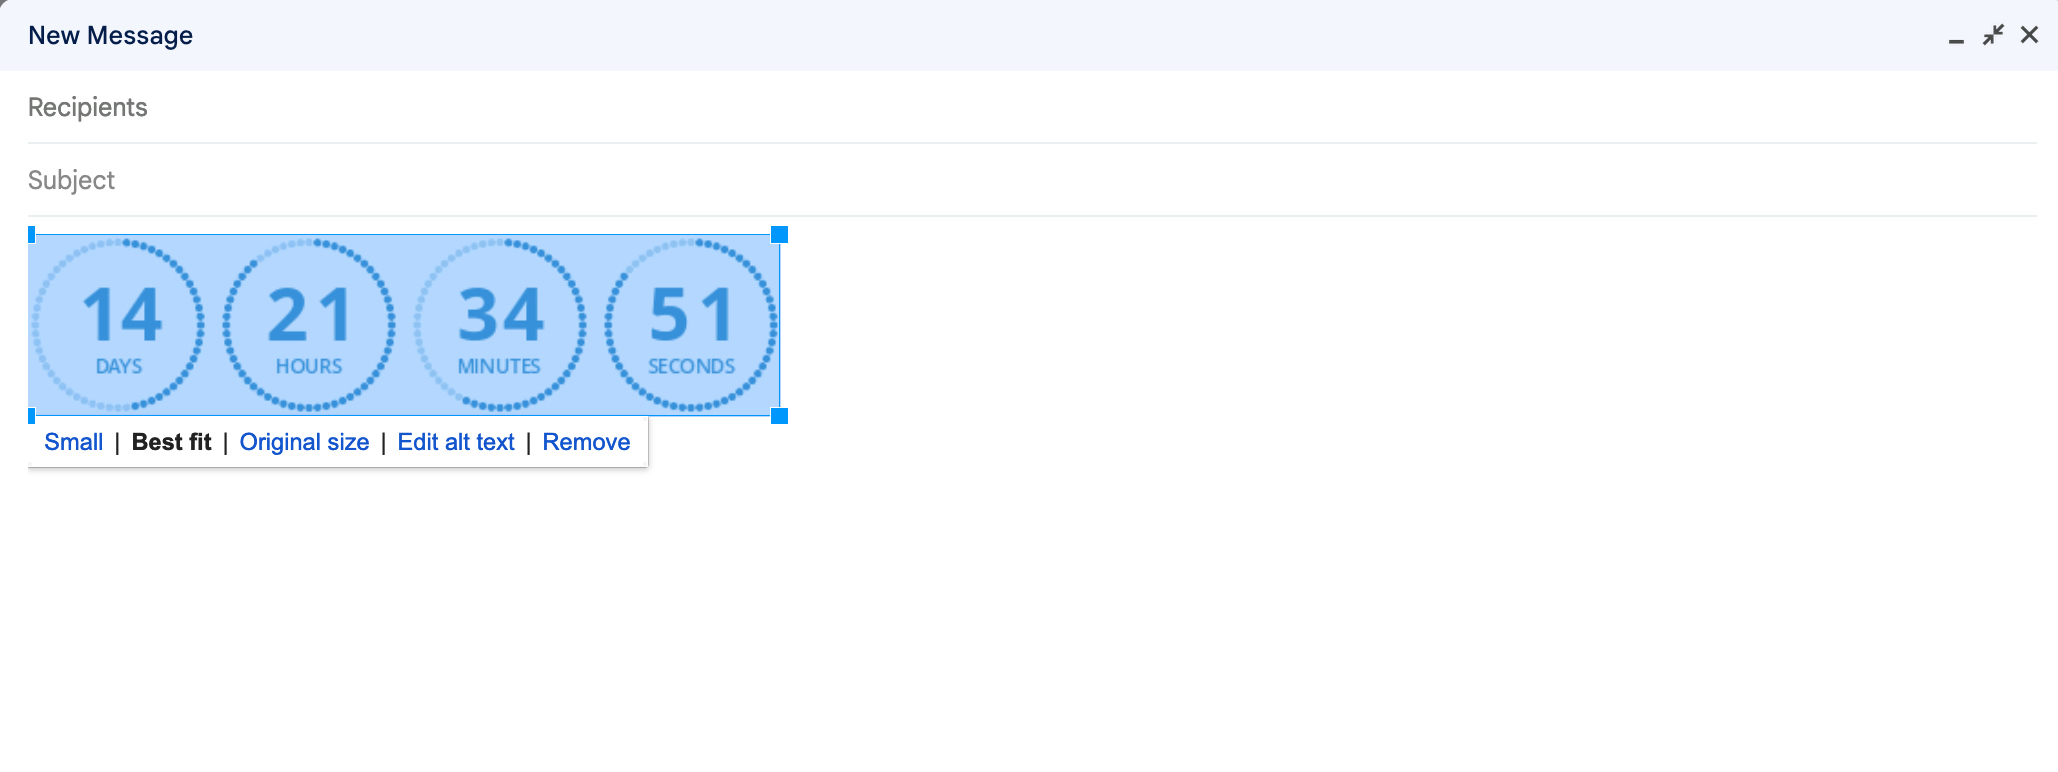
- After inserting the image, click on it to select it.
- Use the size options that appear below the image to choose "Small," "Best Fit," or "Original Size" based on how you want the timer to appear in your email.
Final Tips
- Test Your Email: Before sending the email to your recipients, send a test email to yourself or a colleague to ensure that the countdown timer displays correctly and updates in real-time.
- Real-Time Updates: The countdown timer will update automatically each time the email is opened, as long as the image is fetched from the server. This ensures that your recipients always see the current remaining time.
- Branding Consistency: Make sure the design of your countdown timer aligns with your brand's visual identity for a professional look.
Now that you know how to add a countdown timer to your Gmail emails, it's time to put this knowledge into practice. Experiment with different designs and placements to see what works best for your audience. Remember, a well-placed countdown timer can be the difference between an ignored email and a successful conversion. Start creating your timer on CountdownMail today and take your email marketing to the next level!
Ready to boost your conversions?
Create a countdown timer in minutes and watch your engagement soar.